Give an experiment to demonstrate Hill's reaction.
Experiment to Demonstrate Hill's Reaction
Objective: To demonstrate Hill's reaction, which shows that oxygen is produced from the photolysis of water during photosynthesis in the presence of light and suitable electron acceptors.
Materials Required:
1. Fresh green leaves (preferably from a plant like Elodea or spinach)
2. Test tubes
3. Beaker
4. Sodium bicarbonate (to provide carbon dioxide)
5. Potassium ferricyanide (as an electron acceptor)
6. Light source (lamp)
7. Water
8. Stopwatch
9. Thermometer (to monitor temperature)
10. Petri dish or cover glass
Procedure:
1. Preparation of Leaf Discs:
- Take fresh green leaves and punch out small discs using a hole puncher.
- Place these leaf discs in a beaker filled with water and add a pinch of sodium bicarbonate. The sodium bicarbonate will help saturate the water with carbon dioxide.
2. Vacuum Treatment:
- Use a vacuum pump to create a vacuum in the beaker. This will help the leaf discs sink by removing air trapped in the discs.
- Once the discs sink to the bottom, release the vacuum. The leaf discs should remain submerged.
3. Setting Up the Reaction:
- Prepare a test tube with a solution of potassium ferricyanide in water. This will act as the electron acceptor.
- Place the test tube in a beaker filled with water to maintain temperature and prevent overheating.
4. Illumination:
- Position the beaker with the leaf discs and the test tube under a light source. Ensure that the light is intense enough to facilitate photosynthesis.
- Start the stopwatch to monitor the time.
5. Observation:
- Observe the leaf discs for the production of oxygen bubbles. The oxygen produced from the photolysis of water will cause the leaf discs to rise to the surface of the water.
- Note the time taken for the discs to rise. This indicates the rate of photosynthesis and oxygen production.
6. Recording Results:
- Record the time taken for all the leaf discs to float. This time can be correlated with the intensity of light and the concentration of potassium ferricyanide.
Conclusion:
The experiment demonstrates Hill's reaction by showing that in the presence of light and an electron acceptor (potassium ferricyanide), oxygen is produced from the photolysis of water, evidenced by the rising leaf discs.
---
1. Fresh green leaves (preferably from a plant like Elodea or spinach)
2. Test tubes
3. Beaker
4. Sodium bicarbonate (to provide carbon dioxide)
5. Potassium ferricyanide (as an electron acceptor)
6. Light source (lamp)
7. Water
8. Stopwatch
9. Thermometer (to monitor temperature)
10. Petri dish or cover glass
1. Preparation of Leaf Discs:
- Take fresh green leaves and punch out small discs using a hole puncher.
- Place these leaf discs in a beaker filled with water and add a pinch of sodium bicarbonate. The sodium bicarbonate will help saturate the water with carbon dioxide.
- Use a vacuum pump to create a vacuum in the beaker. This will help the leaf discs sink by removing air trapped in the discs.
- Once the discs sink to the bottom, release the vacuum. The leaf discs should remain submerged.
- Prepare a test tube with a solution of potassium ferricyanide in water. This will act as the electron acceptor.
- Place the test tube in a beaker filled with water to maintain temperature and prevent overheating.
- Position the beaker with the leaf discs and the test tube under a light source. Ensure that the light is intense enough to facilitate photosynthesis.
- Start the stopwatch to monitor the time.
- Observe the leaf discs for the production of oxygen bubbles. The oxygen produced from the photolysis of water will cause the leaf discs to rise to the surface of the water.
- Note the time taken for the discs to rise. This indicates the rate of photosynthesis and oxygen production.
- Record the time taken for all the leaf discs to float. This time can be correlated with the intensity of light and the concentration of potassium ferricyanide.
The experiment demonstrates Hill's reaction by showing that in the presence of light and an electron acceptor (potassium ferricyanide), oxygen is produced from the photolysis of water, evidenced by the rising leaf discs.
Topper's Solved these Questions
- PHOTOSYNTHESIS IN HIGHER PLANTS BOOK - ICSECHAPTER - PHOTOSYNTHESIS IN HIGHER PLANTS EXERCISE - REVIEW QUESTIONS (MISCELLANEOUS QUESTIONS WITH ANSWERS)
8 Videos
- PHOTOSYNTHESIS IN HIGHER PLANTS BOOK - ICSECHAPTER - PHOTOSYNTHESIS IN HIGHER PLANTS EXERCISE - REVIEW QUESTIONS (QUESTION BASED ON EXPERIMENTS)
7 Videos
- PHOTOSYNTHESIS IN HIGHER PLANTS BOOK - ICSECHAPTER - PHOTOSYNTHESIS IN HIGHER PLANTS EXERCISE - REVIEW QUESTIONS (SHORT ANSWER TYPE QUESTIONS)
19 Videos
- PHOTOMORPHOGENESIS IN PLANTSBOOK - ICSECHAPTER - PHOTOMORPHOGENESIS IN PLANTSEXERCISE - REVIEW QUESTIONS (LONG ANSWER TYPE QUESTIONS)
6 Videos
- PLANT GROWTH AND DEVELOPMENTBOOK - ICSECHAPTER - PLANT GROWTH AND DEVELOPMENTEXERCISE - NCERT EXERCISES WITH ANSWERS (DIFFERENTIATE BETWEEN)
11 Videos
Similar Questions
Give an experiment to demonstrate root pressure in a plant.
View SolutionDefine the term transpiration. Design an experiment to demonstrate this process.
View SolutionWhich part of plant perceives light? Give experiments to demonstrate the same.
View SolutionExperiment demonstrating osmosis
View SolutionDescribe an experiment to demonstrate that air exerts pressure.
View SolutionDescribe an experiment to demonstrate the excess pressure inside a soap bubble.
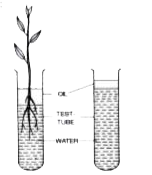
View SolutionThe figure given below represents the set-up at the start of certain experiment to demonstrate an activity of plants:

What is the aim of the experiment?
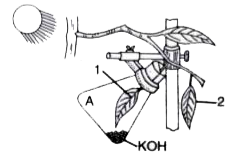
View SolutionThe figure given below represents an experiment to demonstrate a particular aspect of photosynthesis. The alphabet "A" represents a certain condition inside the flask

What is the aim of the experiment
View SolutionDefine transpiration. Describe a simple experiment to demonstrate this phenomenon. In what way is transpiration important for plants ?
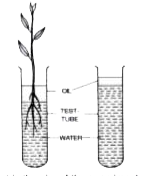
View SolutionThe figure given below represents the set-up at the start of certain experiment to demonstrate an activity of plants:

Give reason to explain any change observed in test tubes after 2-3 days?
View Solution
