SCQ_TYPE from DC PANDEY PHYSICS Chapter 14 GENERAL PHYSICS for Class 11
| Class 11 | PHYSICS |
| Chapter | GENERAL PHYSICS |
| DC PANDEY PHYSICS | SCQ_TYPE |
| Medium | English |
| Academic Year | 2023-2024 |
Question 48
The length of a wire is measured with a metre scale having least count 1mm. Its diameter is measued with a vernier calipers of least count 0.1mm. Given that length and diameter of the wire are measured as 5cm and 4mm, the percentage error in the calculated value of volume of the wire will be View SolutionQuestion 56
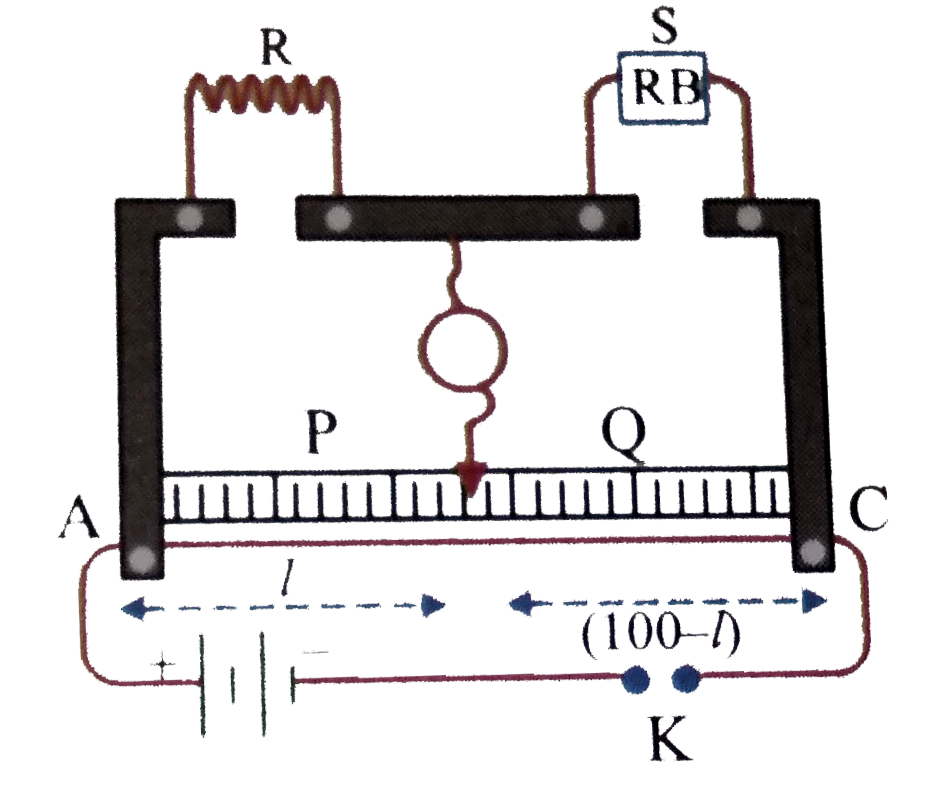
An unknown resistance R1 is connected is series with a resistance of 10Ω. This combination is connected to one gap of a meter bridge, while other gap is connected to another resistance R2. The balance point is at 50cm Now , when the 10Ω resistance is removed, the balanced point shifts to 40cm Then the value of R1 is.View SolutionQuestion 66
The x−y plane is the boundary between two transparent media. Medium-1 with z≤0 has a refractive index √2 and medium -2 with z≤0 has a refractive index √2. A ray of light in medium -1 given by vector A=√3ˆi−ˆk is incident on the plane of separation. The unit vector in the direction of the refracted ray in medium-2 is View SolutionQuestion 79
The length of a rectangular plate is measured by a meter scale and is found to be 10.0cm. Its width is measured by vernier callipers as 1.00cm. The least count of the meter scale and vernier calipers are 0.1cmand0.01cm respectively. Maximum permissibe error in area measurement is.View SolutionQuestion 81
The pitch of a screw gauge is 0.55mm and there are 100 divisions on its circular scale. The instrument reads +2 divisions when nothing is put in between its jaws. In measuring the diameter of a wire, there are 8 divisions on the main scale and 83rd division coincides with the reference. Then the diameter of the wire is View SolutionQuestion 82
The pitch of a screw gauge having 50 divisions on its circular scale is 1mm When the two jaws of the screw gauge are in contact with each other, the zero of the circular scale lies 6 divisions below the line of gradution. when a wire is placed between the jaws, 3 linear scale divisions are clearly visible while 31 division on the circular scale coincides with the reference line. Find diameter of the wire.View SolutionQuestion 83
The smallest division on the main scale of a vernier callipers is 1mm, and 10 vernier divisions coincide with 9 mainn scalel divisions. While measuring the diameter of a spehre the zero mark of the vernier scale lies between 2.0 and 2.1 cm and the fifth division of hte vernier main scale coincide with a main scale division. Then diameter of the sphere is View SolutionQuestion 86
In a meter bridge experiment, null point is obtained at 20cm from one end of the wire when resistance X is balanced against another resistance Y. If X<Y, then the new position of the null point from the same end, if one decides to balance a resistance of 4X against Y will be at.View SolutionQuestion 89
A spring is placed between the jaws of screw gauge such that the spring is not all compressed. The mai scale reads 2 division and circular scale reads 28 divisions. Now we turn the circular scale by 18∘ such that the spring is compessed. The circular scale has 200 divisions and the least count of the main scale is 1mm. What is the force exerted by the spring on the jaws if the spring constnat is 100N/mView SolutionQuestion 90
The pitch of a screw gauge is 1 mm and there are 100 divisions on circular scale. When faces A and B are just touching each without putting anything between the studs 32nd divisions of the circular scale (below its Zero) coincides with the reference line. When a glass plate is placed between the studs, the linear scale reads 4 divisions and the circular reads 16 divisions. Find the thickness of the glass plate. Zero of linnear scale is not hidden from circular scale when A and B touches each other.View SolutionQuestion 91
The pitch of a screw gauge is 0.5m and there are 50 divisins on its circular scale and one man scale division =0.5mm. Before starting the measurement, it is found that when jaws of the screw gauge are brought in contact, the zero of the circular scale lies 5 divisions above the reference line. When a metallic wire is placed betwen the jaws, four main scale divisions are clearly visible and 16th division on the circular scale coincides with the reference line. The diameter of the wire isView Solution

_E01_246_Q01.png)


