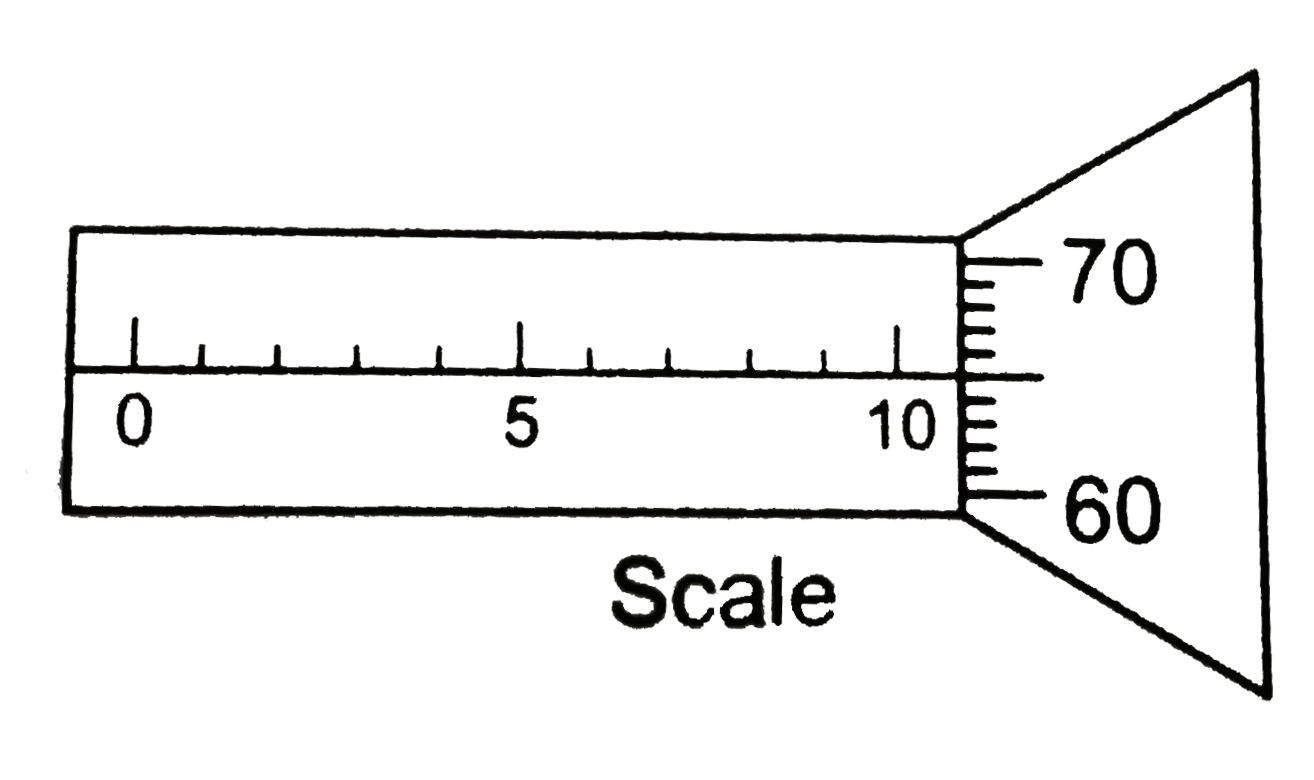
Find the thickness of the wire The main scale division is of 1mm In a complete rotation the screw advances by 1mm and the circular scale has 100 devisions

Excess reading (Zero error) = 0.03mm It is giving 7.67 mm in which there is 0.03mm excess reading which has to be removed (subtracted) so actula reading =7.67−0.03=7.64mm .
Topper's Solved these Questions
- EXPERIMENTAL PHYSICSBOOK - RESONANCECHAPTER - EXPERIMENTAL PHYSICSEXERCISE - Exercise
12 Videos
- EXPERIMENTAL PHYSICSBOOK - RESONANCECHAPTER - EXPERIMENTAL PHYSICSEXERCISE - Exercise -1 PART
1 Videos
- ELECTROSTATICSBOOK - RESONANCECHAPTER - ELECTROSTATICSEXERCISE - HLP
39 Videos
- GEOMATRICAL OPTICS BOOK - RESONANCECHAPTER - GEOMATRICAL OPTICS EXERCISE - Advance level Problems
35 Videos
Similar Questions
Find the thickess of the wire The main scale division is of 1mm In a complete rotation the screw advances by 1mm and the circular scale has 100 devisions Zero error of the screwgase is 0.007mm .
 .
.
View SolutionTwo measure diameter of a wire a screwgauge is used The main scale division is of 1mm In a complete rotation the screw advances by 1mm and the circular scale has 100 devisions The reading of screwgauge is as shown in If there is no error is no error in mass measurement but error in length measurement is 1% then find max Possible error in density
 .
.
View SolutionTwo measure diameter of a wire a screw-gauge is used The main scale division is of 1mm In a complete rotation the screw advances by 1mm and the circular scale has 100 divisions The reading of screw-gauge is as shown in If there is no error is no error in mass measurement but error in length measurement is 1% then find max Possible error in density if diameter is 3.07 mm.
View SolutionRead complete rotation the screw advances by 12mm Circular scale has 50 division .
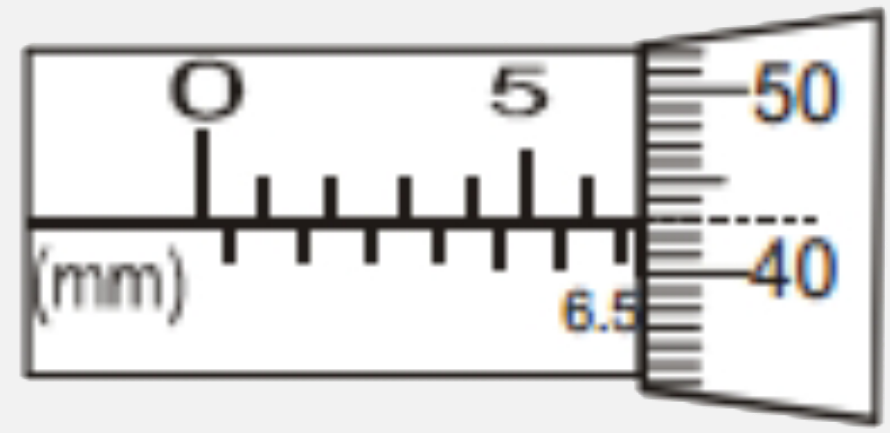
View SolutionThe figure shown below is a screwgauge. When the circular scale division matches the main scale at 43, the 6.5 mm mark on the main scale is just visible. The main scale has 12mm marks. In complete rotation, the screw advances by 12 mm and circular scale has 50 divisions. The reading of the screwgauge is

View SolutionThe figure shown below is a screwgauge. When the circular scale division matches the main scale at 43, the 6.5 mm mark on the main scale is just visible. The main scale has 12mm marks. In complete rotation, the screw advances by 12 mm and circular scale has 50 divisions. The reading of the screwgauge is

View SolutionRead the screwgaug shown bellow Main scale has 12mm marks In complete rotation the screw advances by (1)/(2)mm Circular scale has 50 division .
View SolutionRead the screwgaug shown bellow Main scale has 12mm marks In complete rotation the screw advances by (1)/(2)mm Circular scale has 50 division .
View SolutionRead the screw gauge shown below in the figure.
Given that circular scale has 100 divisions and in one complete rotation the screw advances by 1mm.
 .
.
View SolutionRead the screw gauge shown below in the figure.
Given that circular scale has 100 divisions and in one complete rotation the screw advances by 1mm.
 .
.
View Solution
