Draw a well labelled circuit diagram for the verification of Ohm.s law.
To draw a well-labeled circuit diagram for the verification of Ohm's law, follow these steps:
1. Start with the Battery:
- Draw a battery symbol. Indicate the positive (+) and negative (-) terminals. The battery provides the necessary voltage for the circuit.
2. Add a Key (Switch):
- Draw a key or switch in series with the battery. This allows you to open or close the circuit, controlling the flow of current.
3. Connect a Resistance Box:
- Draw a variable resistance box (rheostat) connected to the switch. This resistance box allows you to change the resistance in the circuit to take multiple readings.
4. Insert a Voltmeter:
- Connect a voltmeter in parallel with the resistance box. The voltmeter measures the potential difference (voltage) across the resistance box. Label it as "V".
5. Insert an Ammeter:
- Place an ammeter in series with the circuit to measure the current flowing through the circuit. Label it as "I".
6. Complete the Circuit:
- Finally, connect the circuit back to the battery to complete the loop. Ensure all components are connected properly.
7. Label All Components:
- Clearly label the battery, key, resistance box, voltmeter, and ammeter in your diagram. You can also label the current (I), voltage (V), and resistance (R) for clarity.
Final Diagram:
- Your final circuit diagram should resemble a simple series circuit with a battery, switch, variable resistance, ammeter, and voltmeter, all properly labeled.
- Draw a battery symbol. Indicate the positive (+) and negative (-) terminals. The battery provides the necessary voltage for the circuit.
- Draw a key or switch in series with the battery. This allows you to open or close the circuit, controlling the flow of current.
- Draw a variable resistance box (rheostat) connected to the switch. This resistance box allows you to change the resistance in the circuit to take multiple readings.
- Connect a voltmeter in parallel with the resistance box. The voltmeter measures the potential difference (voltage) across the resistance box. Label it as "V".
- Place an ammeter in series with the circuit to measure the current flowing through the circuit. Label it as "I".
- Finally, connect the circuit back to the battery to complete the loop. Ensure all components are connected properly.
- Clearly label the battery, key, resistance box, voltmeter, and ammeter in your diagram. You can also label the current (I), voltage (V), and resistance (R) for clarity.
- Your final circuit diagram should resemble a simple series circuit with a battery, switch, variable resistance, ammeter, and voltmeter, all properly labeled.
Topper's Solved these Questions
Similar Questions
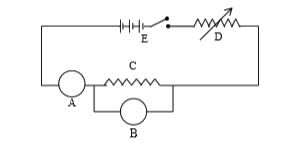
The diagram shows an electrical circuit used for the verification of Ohm's law. Label A, B C, D and E. Draw a sketch to show how the value of current varies for different values of voltage across C.
 View Solution
Draw a well labelled diagram of a DNA helix.
View SolutionDraw well labelled diagram of Marchantia.
View SolutionDraw a well labeled plant cell.
View SolutionDraw a well labelled diagram of a eukaryotic cell.
View SolutionDraw a well labelled diagram of phosphorous cycle.
View SolutionState Ohm's law. Draw a labelled circuit diagram to verify this law in the laboratory. If you draw a graph between the potential difference and current flowing through a metallic conductor, what kind of curve will you get? Explain how would you use this graph to determine the resistance of the conductor.
View SolutionDraw a neat and well labelled diagram for the silver plating on an iron spoon.
View SolutionDraw a well labelled diagram of the longitudinal section of a pistil showing pollen germination .
View SolutionDraw a labelled diagram of L. S. of the kidney.
View Solution

