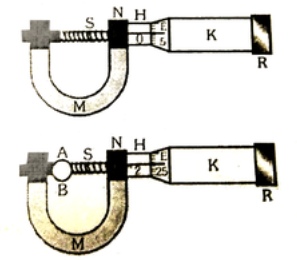
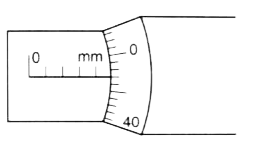
A screw gauge gives the following reading when used to mesure the diametre of a wire.
Main scale reading : 0mm
Circular scale reading : 52 divisions
Given that 1mm on main scale corresponds to 100 divisions of the circular scale. the diameter of wire from the above data is :
0.052cm
0.026cm
0.005cm
0.52cm
The correct Answer is:A
To find the diameter of the wire using the readings from the screw gauge, we can follow these steps:
Step 1: Understand the given readings
- Main scale reading (MSR) = 0 mm
- Circular scale reading (CSR) = 52 divisions
- 1 mm on the main scale corresponds to 100 divisions on the circular scale.
Step 2: Calculate the least count of the screw gauge
The least count (LC) of the screw gauge can be calculated using the formula:
Least Count=Value of 1 main scale divisionNumber of circular scale divisions
Here, 1 main scale division = 1 mm and corresponds to 100 circular scale divisions.
Thus,
Least Count=1 mm100=0.01 mm
Step 3: Calculate the true reading for the diameter of the wire
The true reading (TR) can be calculated using the formula:
True Reading=Main Scale Reading+(Circular Scale Reading×Least Count)−Zero Correction
Since no zero correction is mentioned, we assume it to be 0.
Substituting the values:
- Main Scale Reading = 0 mm
- Circular Scale Reading = 52 divisions
- Least Count = 0.01 mm
Thus,
True Reading=0 mm+(52×0.01 mm)−0
True Reading=0+0.52 mm=0.52 mm
Step 4: Convert the diameter to centimeters (if required)
To convert mm to cm:
0.52 mm=0.5210 cm=0.052 cm
Final Answer
The diameter of the wire is 0.52 mm or 0.052 cm.
---
- Main scale reading (MSR) = 0 mm
- Circular scale reading (CSR) = 52 divisions
- 1 mm on the main scale corresponds to 100 divisions on the circular scale.
The least count (LC) of the screw gauge can be calculated using the formula:
Least Count=Value of 1 main scale divisionNumber of circular scale divisions
Here, 1 main scale division = 1 mm and corresponds to 100 circular scale divisions.
Least Count=1 mm100=0.01 mm
The true reading (TR) can be calculated using the formula:
True Reading=Main Scale Reading+(Circular Scale Reading×Least Count)−Zero Correction
Since no zero correction is mentioned, we assume it to be 0.
- Main Scale Reading = 0 mm
- Circular Scale Reading = 52 divisions
- Least Count = 0.01 mm
True Reading=0 mm+(52×0.01 mm)−0
True Reading=0+0.52 mm=0.52 mm
To convert mm to cm:
0.52 mm=0.5210 cm=0.052 cm
The diameter of the wire is 0.52 mm or 0.052 cm.
Similar Questions
A spectrometer gives the following reading when used to measure the angle of a prism.
Main scale reading : 58.5degree
Vernier scale reading : 09 divisions
Given that 1 division on main scale correspods to 0.5 degree. Total divisions on the vernier scale is 30 and match with 29 divisions of the main scale. the angle of the prism from the above data:
View SolutionThe pitch of a screw gauge is 1mm and its cap is divided into 100 divisions. When this screw gauge is used to measure the diameter of a wire, then main scale reading is 2mm and 58th division of circular scale coincides with the main scale. There is no zero error in the screw gage. Then the diameter of the wire is
View SolutionA screw gauge with a pitch of 1 mm has 100 divisions on its circular scale. What it is used to measure the diameter of a thin wire, the main scale reading is 3 mm and the circular scale reading is 45. If D is the diameter of the wire in mm, then find the value of D.
View SolutionWhen a screw gauge of least count 0.01 mm is used to measure the diameter of a wire, the reading on the sleeve is found to be 1 mm and the reading on the thimble is found to be 27 divisions.What is the diameter of the wire in cm ?
View SolutionThe circular scale of a screw gauge has 50. divisions and pitch of 0.5 mm. Main scale reading is 2. Find the diameter of sphere.

View SolutionIn an internal micrometer, main scale division is of 0.5 mm and there are 50 divisions in circular scale. The least count of the instrument is-
View SolutionThe pitch of a screw gauge is 1 mm and there are 100 divisions on the circular head. While measuring the diameter of a wire, the main scale reads 3 mm and the 55th division is in line with the base line. Find the diameter of the wire. Assume that the screw gauge is free from zero error.
View SolutionIn a screw guage the graduation in the circular scale consists of 100 equal divisions and 10 complete rotation of athe cap is equivalent to 5mm on the main scale . While measuring diameter of a wire with screw gauge a particular observation gives initial circular cap reading as 57 and after completing 3 complete rotation the final circular cap reading as 63 . it is observed that while proceeding from initial reading to final reading the cap reading increases. calculate the diameter of the wire from the above data.
View SolutionFig. below shows the reading obtained while measuring the diameter of a wire with a screw gauge. The screw advances by 1 division on main scale when circular head is rotated once.

Find the diameter of the wire.
View SolutionA spring is placed between the jaws of screw gauge such that the spring is not all compressed. The main scale reads 2 division and circular scale reads 28 divisions. Now we turn the circular scale by 18∘ such that the spring is compessed. The circular scale has 200 divisions and the least count of the main scale is 1mm. What is the force exerted by the spring on the jaws if the spring constnat is 100N/m
View Solution
