Draw a neat and labelled diagram of the chloroplast.
Step-by-Step Solution for Drawing a Neat and Labelled Diagram of the Chloroplast
1. Draw the Outer Membrane: Start by drawing an oval shape to represent the outer membrane of the chloroplast. This membrane encloses the entire structure.
2. Draw the Inner Membrane: Inside the outer membrane, draw another oval shape that closely follows the contour of the outer membrane. This represents the inner membrane of the chloroplast.
3. Add the Stroma: Inside the inner membrane, shade or lightly color the area to represent the stroma, which is the fluid-filled space where various components of the chloroplast are suspended.
4. Draw the Thylakoids (Grana): Inside the stroma, draw stacks of flattened sacs to represent the thylakoids. These stacks are called grana (singular: granum). Make sure to indicate that they are stacked on top of one another.
5. Include Stromal Lamellae: Connect the stacks of thylakoids with thin lines to represent the stromal lamellae, which are the membranes that connect different grana.
6. Add Starch Granules: Draw small circles or ovals within the stroma to represent starch granules, which are the storage form of carbohydrates produced during photosynthesis.
7. Include Lipid Droplets: Draw small oval shapes in the stroma to represent lipid droplets, which are energy storage molecules.
8. Add Ribosomes: Draw tiny dots scattered throughout the stroma to represent ribosomes, which are involved in protein synthesis.
9. Label All Parts: Clearly label each part of the chloroplast diagram:
- Outer Membrane
- Inner Membrane
- Stroma
- Grana (Thylakoids)
- Stromal Lamellae
- Starch Granule
- Lipid Droplet
- Ribosome
Final Touches
- Make sure the diagram is neat and all labels are legible.
- Use a ruler for straight lines and a compass for circular shapes if necessary.
---
- Outer Membrane
- Inner Membrane
- Stroma
- Grana (Thylakoids)
- Stromal Lamellae
- Starch Granule
- Lipid Droplet
- Ribosome
- Make sure the diagram is neat and all labels are legible.
- Use a ruler for straight lines and a compass for circular shapes if necessary.
Topper's Solved these Questions
- PHOTOSYNTHESISBOOK - ICSECHAPTER - PHOTOSYNTHESISEXERCISE - CHOOSE THE CORRECT ANSWER
14 Videos
- PHOTOSYNTHESISBOOK - ICSECHAPTER - PHOTOSYNTHESISEXERCISE - COMPLETE THE FOLLOWING STATEMENTS
30 Videos
- NERVOUS SYSTEM BOOK - ICSECHAPTER - NERVOUS SYSTEM EXERCISE - REVIEW QUESTIONS (Find the odd one out: )
10 Videos
- POLLUTION BOOK - ICSECHAPTER - POLLUTION EXERCISE - REVIEW OLUESTIONS
55 Videos
Similar Questions
(i) Draw a neat and well-labelled diagram of the chloroplast.
(ii) List the events taking place in the photo chemical phase of Photosynthesis.
(iii) If you are planning an experiment to show the effect of light on the photosynthesis :
(1) Will you select white light or green light ? Justify your answer.
(2) Why would you select a destarched plant?
View SolutionDraw a neat and labelled diagram of a tooth.
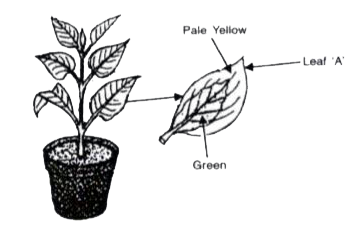
View SolutionA potted plant with variegated leaves was taken in order to prove a factor necessary for photosynthesis. The potted plant was kept in the dark for 24 hours and then placed in bright sunlight for a few hours Observe the diagrams and answer the questions.

Draw a neat labelled diagram of a chloroplast
View SolutionDraw a neat and labelled diagram of a neuron.
View SolutionDraw a neat and labelled diagram of a plant cell.
View SolutionDraw a neat and labelled diagram of a mature anatropous ovule before fertilisation.
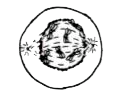
View SolutionThe given diagram shows a stage during mitotic division in an animal cell:

Draw a neat labelled diagram of the cell as it would appear in the next stage. Name the stage.
View SolutionDraw neat and labelled diagrams of the Malpighian Capsule.
View SolutionDraw neat and labelled diagrams of the A Myelinated Neuron.
View SolutionDraw a neat and well labelled diagram for the silver plating on an iron spoon.
View Solution