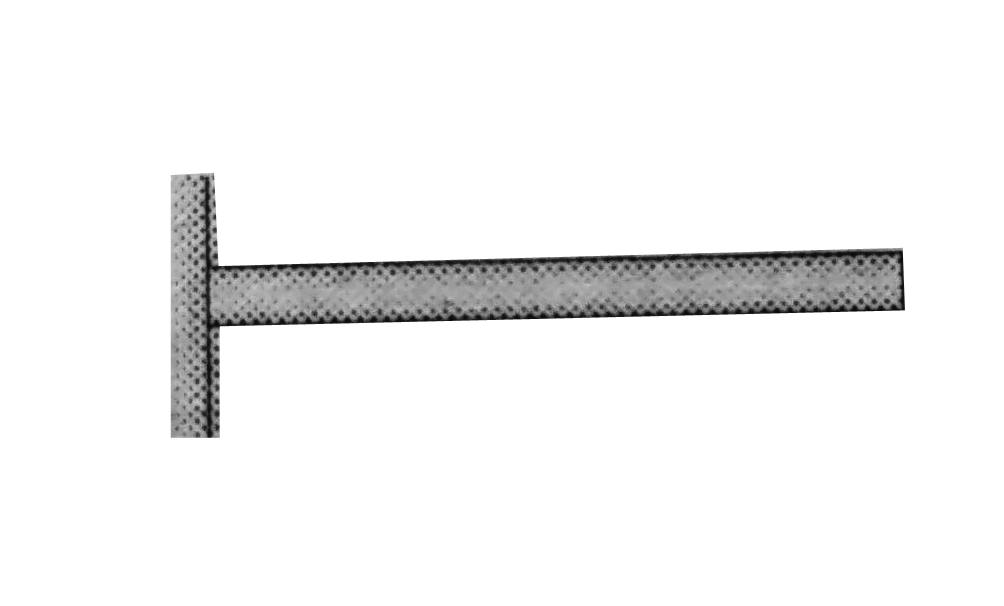
Internal micrometer is a measuring intrument used to measure internal diameter (ID) of a large cylinder bore with high accuracy. Construction is shown in figure. There is one fixed rod B (to the right in figure) and one moved rod A (to the left in figure). It is based on the particle of advancement of a screw when it is rotated in a nut with internal threads. Main scale reading can be directly seen on the hub which is fixed with respect to rod B. When the cap is rotated rod A moves in or cut depending on direction of rotation. The circular scale reading is seen by checking which division of circular scale coincide with the references line
_E01_259_Q01.png)
This is to be multiplied by LC to get circular scale reading.
Least count = value of 1 circular scale division =pitchnumber of division on circular scale
Length of rod A is chosen to match the ID(PQ) to be measured. Zero error is checked by taking reading between standard blocks fixed at normal value of ID to be measured. Zero error is positive if cap end is one the right of the main scale and negative it is on the left side.
_E01_259_Q02.png)
During zero setting of the above instrument, the end of the cap is on left side of the zero of main scale (i.e. zero of main scale is not visible) and 41th division of circular scale coincides with the reference line, the zero error is -
−0.09mm
+0.41mm
−0.41mm
+0.09mm
The correct Answer is:A
Zero error =(50−41)(0.01)=0.09mm
Topper's Solved these Questions
- ERROR AND MEASUREMENTBOOK - ALLENCHAPTER - ERROR AND MEASUREMENTEXERCISE - Part-2(Exercise-2)(A)
16 Videos
- ERROR AND MEASUREMENTBOOK - ALLENCHAPTER - ERROR AND MEASUREMENTEXERCISE - Part-2(Exercise-2)(B)
22 Videos
- ERROR AND MEASUREMENTBOOK - ALLENCHAPTER - ERROR AND MEASUREMENTEXERCISE - Part-2(Exercise-2)(B)
22 Videos
- ELASTICITY, SURFACE TENSION AND FLUID MECHANICSBOOK - ALLENCHAPTER - ELASTICITY, SURFACE TENSION AND FLUID MECHANICSEXERCISE - Exercise 5 B (Integer Type Questions)
3 Videos
- KINEMATICSBOOK - ALLENCHAPTER - KINEMATICSEXERCISE - EXERCISE-2
89 Videos
Similar Questions
Internal micrometer is a measuring intrument used to measure internal diameter (ID) of a large cylinder bore with high accuracy. Construction is shown in figure. There is one fixed rod B (to the right in figure) and one moved rod A (to the left in figure). It is based on the particle of advancement of a screw when it is rotated in a nut with internal threads. Main scale reading can be directly seen on the hub which is fixed with respect to rod B. When the cap is rotated rod A moves in or cut depending on direction of rotation. The circular scale reading is seen by checking which division of circular scale coincide with the references line
_E01_258_Q01.png)
This is to be multiplied by LC to get circular scale reading.
Least count = value of 1 circular scale division =pitchnumber of division on circular scale
Length of rod A is chosen to match the ID(PQ) to be measured. Zero error is checked by taking reading between standard blocks fixed at normal value of ID to be measured. Zero error is positive if cap end is one the right of the main scale and negative it is on the left side.
_E01_258_Q02.png)
In the above instrument, while measuring an internal diameter. ID is set of 321 mm with no zero error. It cap end is after 7th division adn 17th division of main scale coincides with the reference line, the ID is -
View SolutionA screw gauge has main scale divisions of 1 mm each and its circular scale has 50 division. While measuring the diameter of a ball, cap end is after 19th marking of main scale and 21st division of circular scale coincides with the reference line. What is the measured diameter diameter of the ball?
View SolutionThe pitch of a screw gauge is 1mm and its cap is divided into 100 divisions. When this screw gauge is used to measure the diameter of a wire, then main scale reading is 2mm and 58th division of circular scale coincides with the main scale. There is no zero error in the screw gage. Then the diameter of the wire is
View SolutionWhat is the reading of verneir scale shown in figure?

View SolutionThe pitch of a screw gauge is 1 mm and its circular scale has 100 divisions. In measurement of the diameter of a wire, the main scale reads 2 mm and 45th mark on circular scale coincides with the base line. Find the diameter of the wire.
View SolutionIn an internal micrometer, main scale division is of 0.5 mm and there are 50 divisions in circular scale. The least count of the instrument is-
View SolutionName the part of the vernier callipers which is used to measure the following
internal diameter of a mug
View Solution
In the given figure, a rod is free at one end and other end is fixed. When we change the temperature of rod by Δθ, then strain produced in the rod will be
View Solution
In the given figure, a rod is free at one end and other end is fixed. When we change the temperature of rod by Δθ, then strain produced in the rod will be
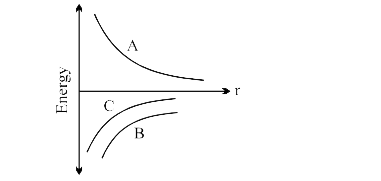
View SolutionThe figure shows the variation of energy with the orbit radius of a body in circular planetary motion.

Find the correct statement about the curves A, B and C
View Solution
