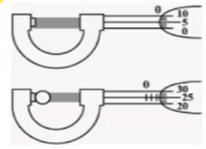
A student measuring the diameter of a pencil of circular cross-section with the help of a vernier scale records the following four reading 5.50 mm, 5.55 mm, 5.45 mm , is 5.5375 mm and the standard deviation of the date is 0.07395 mm. The average diameter of the pencil should therefore be recorded as :
(5.5375±0.0739)mm
(5.5275±0.0740)mm
(5.538±0.074)mm
(5.54±0.07)mm
To determine the average diameter of the pencil based on the given readings and the concept of significant figures, we can follow these steps:
1. List the Measurements:
The measurements recorded are:
- Reading 1: 5.50 mm
- Reading 2: 5.55 mm
- Reading 3: 5.45 mm
- Reading 4: 5.5375 mm
2. Calculate the Average:
To find the average of the first three readings:
Average=5.50+5.55+5.453
Average=16.503=5.50 mm
3. Determine Significant Figures:
- The first three readings (5.50 mm, 5.55 mm, and 5.45 mm) each have 3 significant figures.
- The fourth reading (5.5375 mm) has 5 significant figures, but we will consider the significant figures of the first three readings since they dictate the precision of the measurement.
4. Final Average with Correct Significant Figures:
Since the average must be reported with the same number of significant figures as the measurements with the least significant figures, the average diameter should be recorded as:
Average Diameter=5.50 mm
Conclusion:
The average diameter of the pencil should be recorded as 5.50 mm.
---
The measurements recorded are:
- Reading 1: 5.50 mm
- Reading 2: 5.55 mm
- Reading 3: 5.45 mm
- Reading 4: 5.5375 mm
To find the average of the first three readings:
Average=5.50+5.55+5.453
Average=16.503=5.50 mm
- The first three readings (5.50 mm, 5.55 mm, and 5.45 mm) each have 3 significant figures.
- The fourth reading (5.5375 mm) has 5 significant figures, but we will consider the significant figures of the first three readings since they dictate the precision of the measurement.
Since the average must be reported with the same number of significant figures as the measurements with the least significant figures, the average diameter should be recorded as:
Average Diameter=5.50 mm
The average diameter of the pencil should be recorded as 5.50 mm.
Topper's Solved these Questions
Similar Questions
A student makes measurements of the diameter of a wire with the help a screw gauge and he gets the following readings : 0.38,0.40,0.39,0.37,0.41,0.40,0.38,0.39,0.40 and 0.41 mm. Calculate the average error and standard deviation of his measurements.
View SolutionWhile measuring the diameter of a sphere with a vernier callipers M.S.R and V.S.D. are 35 mm and 5 respectively . If the vernier scale coinciding with 19 division of main scale what is the diameter of the sphere?
View Solution
Knowledge Check
To determine the diameter of a rod a student wound a thread 5 times round the rod and measured the length of thread as 156 mm on a metre scale. Using this value he calculated the diameter of the rod. If the actual diameter of the rod is 9.94 mm, what is the error that could result in the method followed by the
student? Take pr+q2A+ 0.01 mmB- 0.01 mmC+ 0.02 mmD- 0.02 mmTo determine the diameter of a rod a student wound a thread 5 times round the rod and measured the length of thread as 156 mm on a metre scale. Using this value he calculated the diameter of the rod. If the actual diameter of the rod is 9.94 mm, what is the error that could result in the method followed by the
student? Take pr+q2A+0.01 mmB−0.01 mmC−0.01 mmD−0.02 mmA screw gauge gives the following reading when used to measure the diameter of a wire. Main scale reading =0mm, circular scale reading =52 divisions. Given that 1mm on main scale corresponds to 100 divisions of the circular scale. The diameter of the wire from the above data is
A0.052cmB0.026cmC0.005cmD0.52cm
A screw gauge with a pitch of 1 mm has 100 divisions on its circular scale. What it is used to measure the diameter of a thin wire, the main scale reading is 3 mm and the circular scale reading is 45. If D is the diameter of the wire in mm, then find the value of D.
View SolutionA screw gauge gives the following reading when used to mesure the diametre of a wire.
Main scale reading : 0mm
Circular scale reading : 52 divisions
Given that 1mm on main scale corresponds to 100 divisions of the circular scale. the diameter of wire from the above data is :
View SolutionThe vernier constant of a vernier callipers is 0.1mm and it has a positive zero error of 0.04cm. While measuring diameter of a rod, the main scale reading is 1.2cm and 5th vernier division is coinciding with any scale division. The correct diameter of the rod is
View SolutionThe number of circular divisions on the shown screw gauge is 50 it moves 0.5mm on main scale for moone complete rotation Main scale reading is 2 The diameter of the balls is
 .
.
View SolutionThe main scale of vernier callipers is divided into 0.5mm and its least count is 0.005cm. Then the number of divisions on vernier scale is
View Solution
